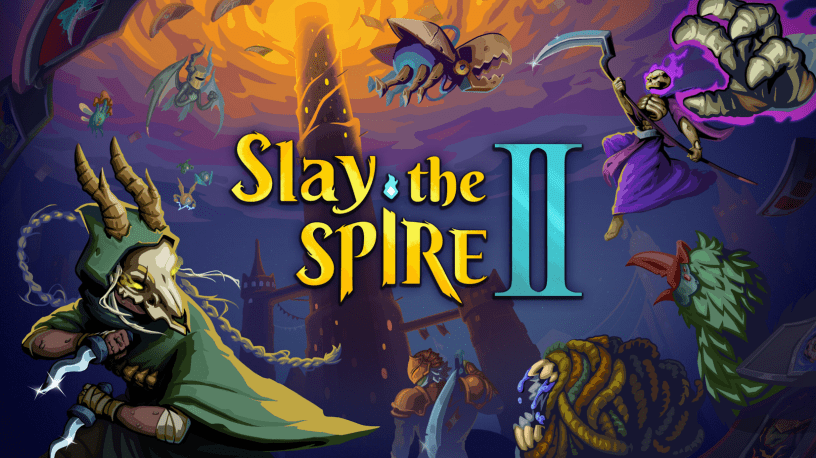
With the release of Slay the Spire 2 into Early Access, one thing has become abundantly clear: the sequel is a fair bit harder than the original. There are a handful of different factors for why that is, but chief among them is how Ascension levels (Slay the Spire’s graduated difficulty levels) have been reworked. There are fewer of them – 10, down from 20 – which means the game’s difficulty ramps up quicker when compared to the original.
Unfortunately, this change has also significantly increased the skill floor for Ascension 0. There are no longer early Ascension levels dedicated to making enemies tougher, which has made every combat encounter that much more challenging in the game’s default difficulty.
That’s all to say, if you’ve been having a tough time scoring a win then it isn’t your imagination: Slay the Spire 2 is a significantly harder game compared to its predecessor.
Having said that, all hope is not lost. While the sequel is tougher, there are several things that you can do to increase your odds of winning a run in Slay the Spire 2. I’ve captured a few of them below, and hope that they’ll prove effective if you’re struggling to win.
As always, I read every comment (for moderation purposes) so if you’ve got any questions, you can give me a shout. I’ll try to answer as best as I’m able to.
Without any additional preamble, here are some Slay the Spire 2 tips to score your first win:
Don’t Put Your Eggs in 1 Basket
I’m anticipating this will be my most controversial piece of advice, but I’m going to give it anyway: stop betting everything on a specific deck archetype.
Though, I want to make sure we’re on the same page about archetypes before I continue.
When I say archetype, I’m referring to a set of character specific cards that naturally synergize with one another. As a quick example, one of the popular archetypes on the Defect is a Claws deck. This will feature cards like Claw, Feral, Hologram, and Sweeping Beam. The focus is to play your 0 cost Claw card(s) as often as possible, and draft cards that help to facilitate that strategy.
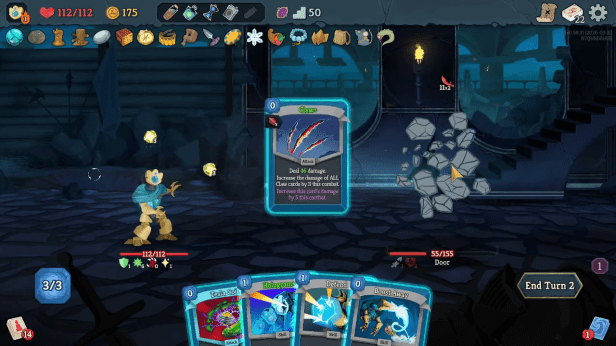
These sorts of archetypes exist on all characters, and make a lot of intuitive sense to leverage. After all, your deck becomes a lot more powerful when you draft cards that naturally synergize with one another.
However, decks that can only do 1 thing extremely well always lack the necessary flexibility to actually win a full run in Slay the Spire 2. When you play like this, you’re basically gambling, and betting that you won’t run into any of the combat encounters that hard-counter your deck. If you’ve ever taken a Claws, or Shiv deck into the Time Eater in the first Slay the Spire then you know exactly what I mean.
As such, you’ll instead want to draft cards that allow you some amount of flexibility with your overarching strategy. That doesn’t mean you throw archetypes into the garbage. Instead, you should leverage cards that can benefit from multiple archetypes. This won’t be as powerful as going all-in on a single strategy, but it will allow you to pivot for encounters where your primary strategy won’t prove as effective.
Here’s an example from an Ascension 7 run I just completed on the Necrobinder:
The primary focus of my deck was to make Osty as big as possible. This would ensure that I could tank hits by having Osty absorb any damage that I couldn’t block. In order to facilitate this, I drafted cards like Reanimate, Sic’ Em, and Afterlife. These would help to pump Osty’s health up, in rapid succession.
Though, this was only half of the strategy because I needed some way to do damage too.
Thankfully, I was also able to draft Necro Mastery, and later upgraded Unleash into Protector.
All of these cards together meant that I was reliably able to pump up Osty’s max HP to around 80. From there, Protector could completely obliterate everything for massive damage.
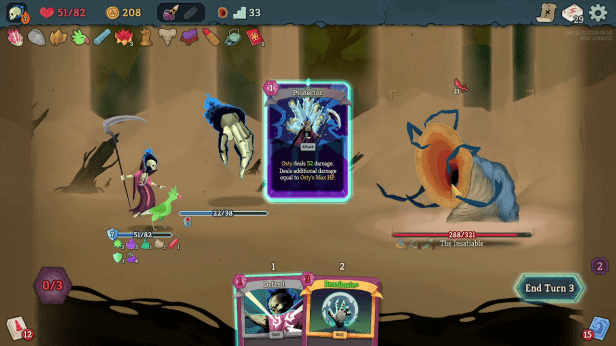
However, this strategy fell apart during fights like Knight Gang, and the Queen because Osty couldn’t completely outpace the incoming damage every turn. Ergo, Protector couldn’t perform as my sole source of damage within these fights.
Thankfully, I planned ahead and grabbed a copy of Call of the Void, which I later upgraded, as well as copies of Negative Pulse, and No Escape. None of these cards were an alternative strategy alone, but I was able to combine the 3 to make winning via Doom a viable alternative when Big Osty wasn’t possible.
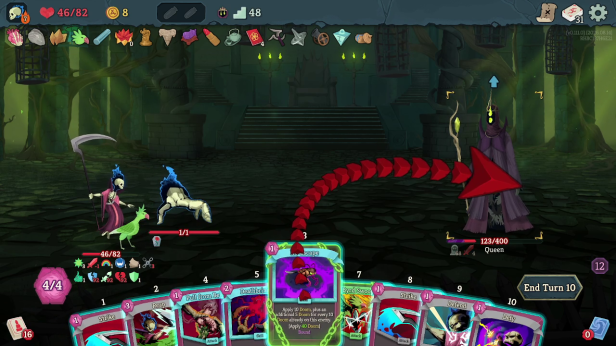
It also helped that I had Poke, and Flatten – both upgraded with an Instinct Enchantment – to help pepper foes down with very strong 0 cost attacks in situations where Big Osty didn’t make a ton of sense.
In this way, I was able to pivot my deck between 3 strategies – Big Osty into Protector, Doom, or burst damage with Poke + Flatten – depending on what made the most sense.
Basically, you want to build your deck such that you can pivot when you need to since there aren’t really any strategies that can easily answer every single fight in the game. Instead, it’s best to have a deck that can flip-flop between a couple win conditions depending on what will work best for whatever you’re fighting.
Stop Taking Cards That Don’t Provide Immediate Benefit
This is a little bit more of a high-level strategy, but I think it’s important advice to learn early.
If a card doesn’t immediately work within your deck, then you should never take it. Regardless of how good a card could become, if you’re not able to use it right away then you’ve basically added a Curse to your deck. That’ll only hurt you in the short-term by clogging up your hands, which will cause you to take more damage in fights, and force you to waste Rest Sites on healing instead of upgrades.
In no uncertain terms, this kind of drafting will kill more of your runs than simple misplays, or bad RNG.
As such, before you draft a card, you should be asking yourself if the card does anything for you. To answer that, consider the following:
- Do I need more damage, and does this card solve that?
- Do I need more defence, and does this card solve that?
- Does this card interact with several of my cards?
- Does this card interact with 1 or more of my Relics?
If you don’t answer yes to at least 1 of those then you shouldn’t take the card in question. It doesn’t matter how good the card is in a vacuum – if a card doesn’t immediately provide value then it’s actively hurting your run.
As a quick example of what I mean, let’s use the Ironclad’s Rupture.
This card gives players 1 Strength every time they lose HP during their turn. Rupture all but ensures that your attacks will continue to deal ever increasing damage, which is a very straightforward solution to most boss fights. Ergo, it is a very powerful card.
However, Rupture is completely useless if you don’t have any cards that inflict self damage.
As such, we need to change the order that we draft cards in. That is to say, if we see Rupture early in our run then we should skip it if we don’t have cards that can trigger it. Instead, we should look for cards like Breakthrough, Blood Wall, Bloodletting, or Hemokinesis first, and then we can take Rupture if it comes up later in the run. By drafting in this way, you’ll ensure that new cards are always making your deck stronger.
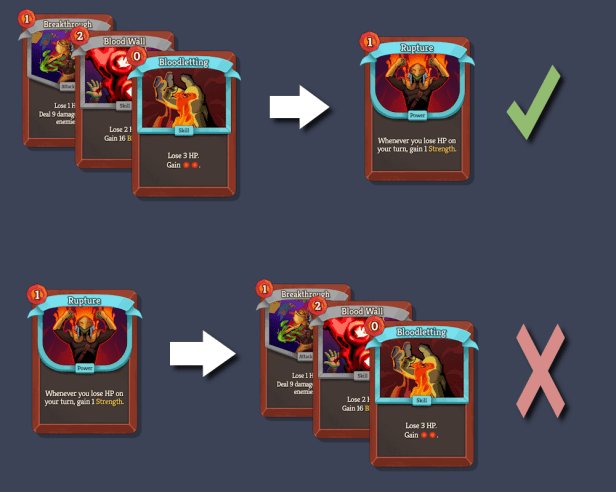
It isn’t enough to simply identify, and draft good cards if you want to win. Instead, you need to get better at identifying which cards are “pay-off” cards, and you need to draft them only when your deck can actually support them. This will ensure that you can leverage the powerful effects of these cards to their fullest, instead of carrying dead-weight around hoping it will pop off in the future.
For a deeper breakdown of this concept, consider watching videos by Caleb Gannon Gaming. He’s the content creator that originally got me thinking about Slay the Spire in this way, and it’s helped tremendously with my consistency. I’ve linked one of his videos for consideration, but all of his guides are good, especially if you’re trying to break into higher Ascension levels.
Visit More Event Tiles
This one is fairly straight-forward: you should try to visit Event tiles – referred to in-game as Unknown tiles – more often.
I don’t think it is contentious to say that events were a little lacklustre in the original Slay the Spire. Some were alright, but the majority felt like they actively punished players without a commensurate reward to offset what happened.
The same is not true in Slay the Spire 2. At the time of writing, there are 57 different events spread across the game’s 3 Acts, and the overwhelming majority of them offer players a worthwhile reward. Some allow you to thin out your deck, others give you easy access to relics, and yet more provide Enchantments for your cards. None of these bonuses are game-breaking in isolation, but they add up over the course of a run, which can help to give you an extra edge.
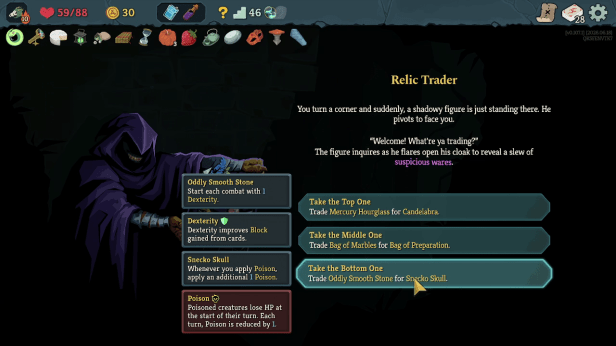
Though, I must qualify this advice: don’t take events at the expense of your early combat encounters. The first 2 (usually 3) combats in every Act are considerably easy compared to the remainder of the Act. This allows you the opportunity to draft 2-3 easy cards every Act before the difficulty actually starts to ramp up.
As such, I’d caution against giving up these easy card drafts in exchange for events. Sometimes, those first few drafts will give you exactly the card that you need to beat the current set of Elites, or the Act’s final boss.
That said, events are still (generally) quite good, so try to hit up a handful of them throughout your journey.
Don’t Be Afraid to Take Riskier Event Options
In keeping with the previous bit of advice about taking more events, I’d also encourage you to exercise the riskier options some of the time.
It can be all too easy to fall into a pattern of trying to constantly play things safe: mitigate all damage, don’t take unnecessary risks, and calculate every turn with precise accuracy. The thing is, playing safe usually gets you killed in the long-run. Slay the Spire 2 is balanced around players taking some of the riskier options with higher payouts. Unfortunately, this means that your deck will fall behind the game’s power curve if you’re always playing safe.
For a quick example of what I mean let’s examine the event This or That?
In this event players are given 2 options:
- Take damage equal to ~10% of their Max HP to receive 40-60 Gold
- Add a Clumsy Curse to their Deck in exchange for a random Relic
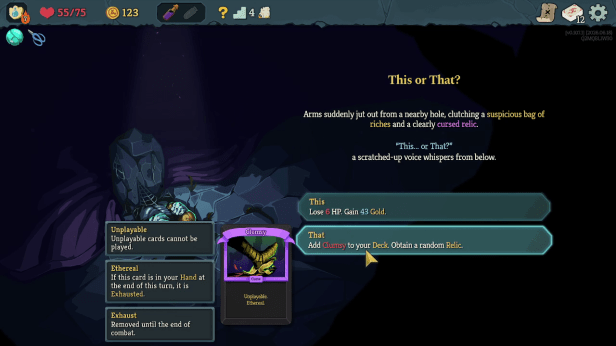
At first brush, the first option will probably seem like the safer one. You take a little bit of damage, but you don’t have to add a useless Curse card into your deck. Then you can rest at the next Rest Site to heal off all of the damage, and you’ll have additional Gold for the next Shop that you visit.
However, if you aren’t planning to visit a Shop in the near future then what does getting additional Gold actually do for you? Nothing. In fact, if you take that first option and are subsequently forced to heal at the next Rest Site, then you’ve actively lost out on the opportunity to upgrade 1 of your cards.
This is not how you win runs in Slay the Spire 2.
By contrast, the second option gives you a Relic. While not all Relics are built equally, the overwhelming majority of them provide game warping effects to your run. This can increase the potential power of cards that are already in your deck, or make future card drafts more powerful.
For a few quick examples, consider the following:
Anchor gives players 10 Block on their first turn. This makes any Power card with Innate (ex. Infinite Blade+, Call of the Void+, Machine Learning+) a lot easier to play since you won’t have to worry about playing as many Block cards on your first turn.
Snecko Skull applies an additional 1 Poison whenever the Silent applies Poison to an enemy. This works exceptionally well with cards like Noxious Fumes, or Deadly Poison, but causes cards like Bouncing Flask, and Envenom to deal disproportionately high volumes of Poison throughout a combat encounter.
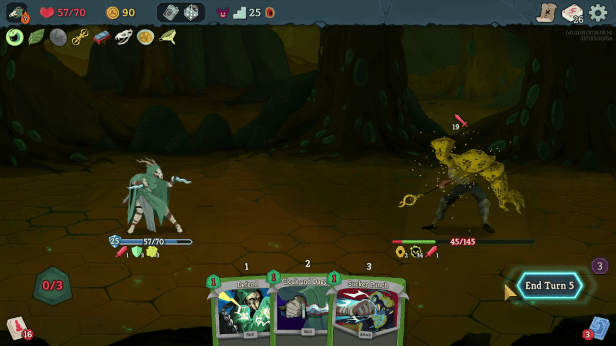
Happy Flower provides an additional Energy every third turn. This makes cards with Retain (ex. Snakebite, Monologue+, Reap) a lot more valuable as you’re able to save them for your turns where you have extra Energy.
Those are 3 examples using Common Relics. The potential synergies go so much deeper when you add in the full breadth of available Relics since This or That? can pull a Relic of any rarity.
That said, it is true that you’ll be saddled with a copy of Clumsy in exchange for the Relic. However, consider that Clumsy is Ethereal, so it’ll Exhaust from your hand after you draw it. This means that you’ll only draw it once per combat. In the grand scheme of things, that’s a fairly small price for even a “bad” Relic. And there’s always a chance that you get a Relic that completely warps the trajectory of your run.
While it won’t always be the best play to take the riskier option, it is sometimes. That being the case, you should actively tempt fate, and try to leverage some of the riskier options within events as they tend to pay for themselves across the run.
Don’t Ignore Your Relics When Drafting Cards
For the longest time, I was guilty of this. I’d sort of just collect Relics throughout my runs, and if they happened to work with whatever I was already building towards then I’d be fairly excited. Otherwise, I didn’t put much thought into what an individual Relic brought to the table.
This was stupid. Almost all of the Relics in the game provide incredibly useful passive, or active effects that can completely redefine the shape of your run. In fact, they’re typically so powerful that they’re worth considering when you draft cards because some of the game’s most broken synergies manifest when specific cards interact with certain Relics.
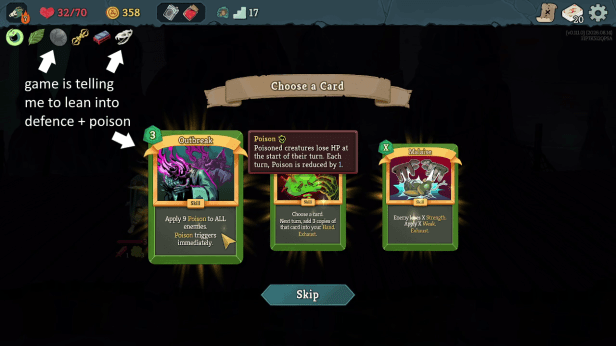
For example, if you have Parrying Shield, and Snecko Skull on the Silent then the game is telling you to lean into a more defensive playstyle. Instead of attacking directly, you’ll get more value out of Poison cards thanks to Snecko Skull applying 1 additional Poison, and Parrying Shield does 6 damage whenever you have at least 10 Block. Ergo, I needed to adopt a more passive, Poison-focused playstyle to leverage these Relics properly.
However, that incredibly passive playstyle wouldn’t be as powerful without either of those Relics in tow. That’s why it is so important to consider what your Relics do, and try to draft cards that work with them. This will cause your deck to explode with power in a way that simply drafting synergistic cards can’t achieve.
Don’t Be Afraid of Elites
Speaking of Relics, there’s no better way to earn those than fighting Elites. As was true in the first game, I think that regularly fighting Elites is important in Slay the Spire 2. In fact, I think it’s even more important to tackle, and master fighting Elites than it was in the first game because of how quickly the sequel’s difficulty ramps up throughout a run.
My reasons for thinking this way are quite simple: Elites are both more rewarding, and more predictable than standard combat encounters. Every time you beat an Elite you will receive a Relic for your trouble. However, Elites also have a higher chance of rewarding Rare cards, and Potion. They also give players more Gold.
In essence, beating an Elite can look as follows:
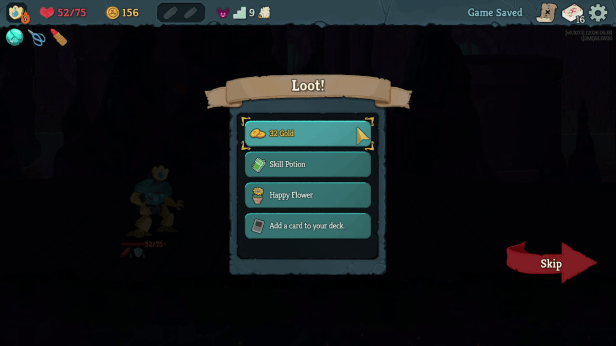
By contrast, regular encounters don’t give you a Relic, offer less Gold, and have a lower chance of awarding a Rare card and/or Potions.
As such, I have to ask the question: would you rather be showered with goodies, or receive next to nothing after you clear a tough fight?
As for the second point that I made about predictability: you always know which Elties will spawn in a given area. This means that you can prep your deck with cards that’ll specifically counter their strategies. For example, if you’re in the Overgrowth then you know that you need to draft a high damage attack, or a solid AoE attack for the Phrog Parasite. Knowing that, you can draft cards accordingly, and prepare for these tough encounters.
By contrast, if you’re doing standard combat encounters then you could run into the Mawler, the group of raiders, or 3 Inklets. All 3 of these fights require very different styles of deck to counter properly. However, you won’t know precisely which fights you’re going to run into, so it becomes a lot harder to prepare for them compared to Elites which (generally) share common counter strategies.
For these reasons, I’d advocate that players should be trying to tackle a couple Elite fights during each Act. Though, I will stress that you should only attempt to take on Elites once your deck is powerful enough to do so. Usually, you’ll have the cards that you need by around the midpoint in Act 1 if you’ve been drafting cards throughout the first 2-4 combats. As such, it’s important to prioritize cards that help to beat Elites during your opening few drafts.
As a quick primer, here’s what you should look for depending on which area you get for Act 1:
| Act Name | Cards to Draft |
|---|---|
| Underdocks | Cards with high Block |
| Overgrowth | Cards with high Attack |
Once you hit Acts 2 and 3, the specific counters become a little more murky. Generally, you need a deck that can block high, draw additional cards on demand, and has some kind of damage scaling solution. So, basically you need a strong, functional deck. I know that’ll sound like a big ask, but you’ll usually have one if you made it through Act 1 because of how tough all of the Act 1 bosses are.
Either way, don’t let your fear of Elites keep you from fighting them. They’re almost always worth the trouble.
Play the Fight – Not the Turn
Let’s say that you’re fighting the Entomancer. You know that he does his big Beeees! attack every 3 turns, and you need to have block ready because he’s going to unleash the bees next turn. As such, you decide to unload on him during the turn where he increases his attack power since you won’t need to block.
Unfortunately, this generates a bunch of Dazed Status cards in your draw pile, and you fail to score the KO.
Even more unfortunate, you draw all of those Dazeds next turn, and are subsequently ripped to pieces by the bees.
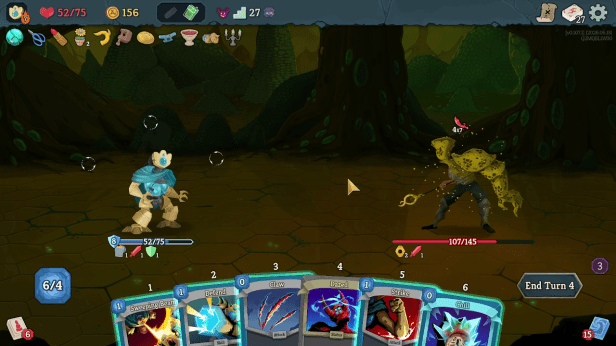
Has this ever happened to you?
The mistake here was playing the immediate turn, as opposed to playing the combat. What I mean is that you know Entomancer’s big attack happens every 3 turns. You also know that each attack against him stuffs a bunch of Dazed cards into your draw pile. As such, unless you can kill him, it doesn’t make a ton of sense to unload on the Entomancer during the turn where he powers up. If you do, then you’re going to increase the odds that you draw a Dazed during his big attack, which will make it harder to block.
As such, I’d encourage you to stop asking “how do I survive this turn?”, and start asking “how do I survive this fight?” You need to determine when it makes the most sense to attack, like in the example above, and when you should just defend. The better you get at doing this, the easier it becomes to beat both Elites, and Bosses across the whole of Slay the Spire 2.
Also, if you’re curious, you usually want to attack Entomancer on his second attacking turn. It does less damage, and you’re less likely to get screwed over drawing into Dazed on the following turn.
Though, ideally you just want to set up, and punch through his lifebar with a few very strong attacks.
Regardless, it’s important to be mindful of what enemies are doing on future turns just as much as what they’re doing on the current turn. Keeping track of what an enemy is going to do next turn, and having a plan to counter it is how you win tougher fights.
Don’t Sleep on Potions
Potions are so unbelievably strong in Slay the Spire 2.
If you only played Slay the Spire around its release then I could forgive you for thinking that Potions were kind of weak. However, Potions were buffed considerably over the course of Slay the Spire’s lifetime, and all of those improvements (and then some) have been carried forward into the sequel. As such, Potions are unbelievably strong, and can single-handedly win you fights that your deck otherwise isn’t prepared for.
For example, a Vulnerable Potion can easily net you a 3 turn win against Byrdonis, or the Bygone Effigy. Both of these fights are just a damage race, so dealing 50% more damage across the whole fight is a huge bonus.
Better yet, you can carry Potions without clogging up your deck, and you’re able to use them whenever you deem it appropriate. In the case of that Vulnerable Potion, it’s basically like you have a copy of Tremble, but it is Innate, has Retain, and all 5 classes have access to it.
It’s also worth noting that Potions are a lot cheaper than Relics. This means that they can be easily purchased at shops ahead of difficult combat encounters like an upcoming Elite fight.
Honestly, there are so many times where taking a single Potion has allowed me to coast through an Elite, which meant that I could afford to upgrade a card at the next Rest Site. This meant that single Potion effectively earned me a Relic and a card upgrade, which is extremely high value given how inexpensive Potions are relative to other items at the shop.
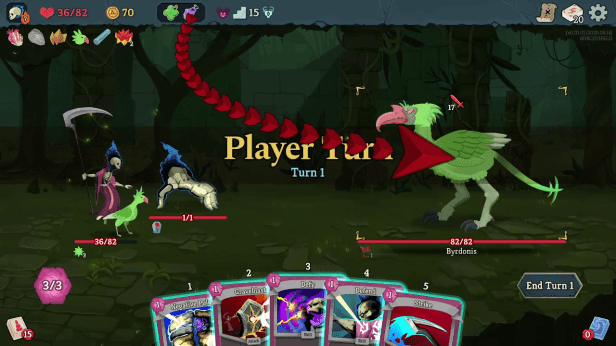
As such, consider Potions the next time you need a tiny bump in power to get through an Elite, or Boss fight. They could make the difference you need to start steamrolling through the remainder of your run.
You Can Save & Quit to Retry Fights
This is a little cheesy, and feels a bit like an exploit, but you can replay every single fight in Slay the Spire 2 by quitting before you die. The game only saves at the start and end of fights, instead of between each turn. As such, if you make several critical misplays, you can simply reload the fight and try again.
Do keep in mind that you will not draw your cards in a different order. The seed for how your deck is shuffled will be identical, so you’ll still draw cards in the same order when you reattempt a fight. As such, you can’t retry a fight hoping you’ll get better RNG with what cards you draw. Instead, this simply allows you to retry a fight playing your cards in a different order to see if you can achieve a different outcome.
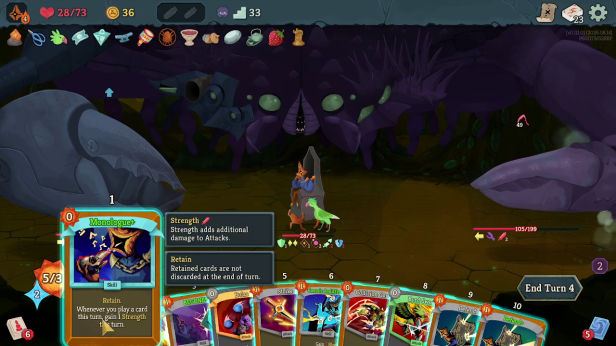
There have been more than a handful of times where I’ve seriously bungled a fight, and used this to course correct. Plus, it can also be handy for experimenting to figure out how best to tackle certain fights if you’re unsure about them. For example, you can run a multi-enemy fight a few times to determine what the optimal order to kill each foe is if you’re not able to intuit that from the word go.
And, yes, this is a little cheesy, but the game doesn’t stop you from doing it. Ergo, I think it’s fair game. If Mega Crit didn’t want players doing this then they’d change the game to save every turn. As such, I’d say replaying fights is fair game.
With that little bit of cheese, I think I’ll call it there. My hope is that 1 or more of these tips helped to get your wheels turning, and you’ll be able to tackle your future runs with a bit more consistency.
As I said at the top, Slay the Spire 2 is a harder game than its predecessor, which has resulted in a much higher skill floor relative to the first game. That said, there’s a lot of small changes that you can make to improve the consistency of your play. Your runs don’t just have to be a bunch of gambling. Instead, you can play in a way that helps to improve your consistency, such that you can crush the game even on those higher Ascension levels.
Did you enjoy what you read? Consider supporting my work by buying me a coffee over on Ko-fi.


https://i.ytimg.com/vi/U0e0cV_46lc/hqdefault.jpg
You can’t tell me what to do.
LikeLiked by 1 person
Glad it’s not just me. After all my hours in the first one I expected to get my first win in 2 pretty quickly, and it took way longer than I’d like to admit. A0 feels closer to low ascension in StS1.
LikeLike